Reducing Video Size for Canvas Studio
What’s the Problem?
Although Canvas Studio has a file size limit of 10GB, you could encounter upload issues with smaller file sizes. Most upload problems are related to the time it takes to transfer the file from your computer to the Canvas Studio. If it takes too long, there can be disruptions and eventually, the upload will fail. On campus the internet connectivity is more consistent than a home connection.
You can reduce the file size through compression and reducing length. Short videos are preferable for the online learning experience. First, try to break up longer videos into smaller, more focused videos. When reducing video length isn’t enough, it’s time to shrink the file with compression.
Compress With Handbrake
The most common compression software is Handbrake (external site). It is free and available on all types of computers. Download the software and proceed through the installation process. Depending on your computer access privileges, you may need assistance from IT Support to install Handbrake.
Once installed, follow the step-by-step guide below. The interface in the images below is from the Mac version of the software. However, the terminology and position of the buttons are relatively similar across all versions.
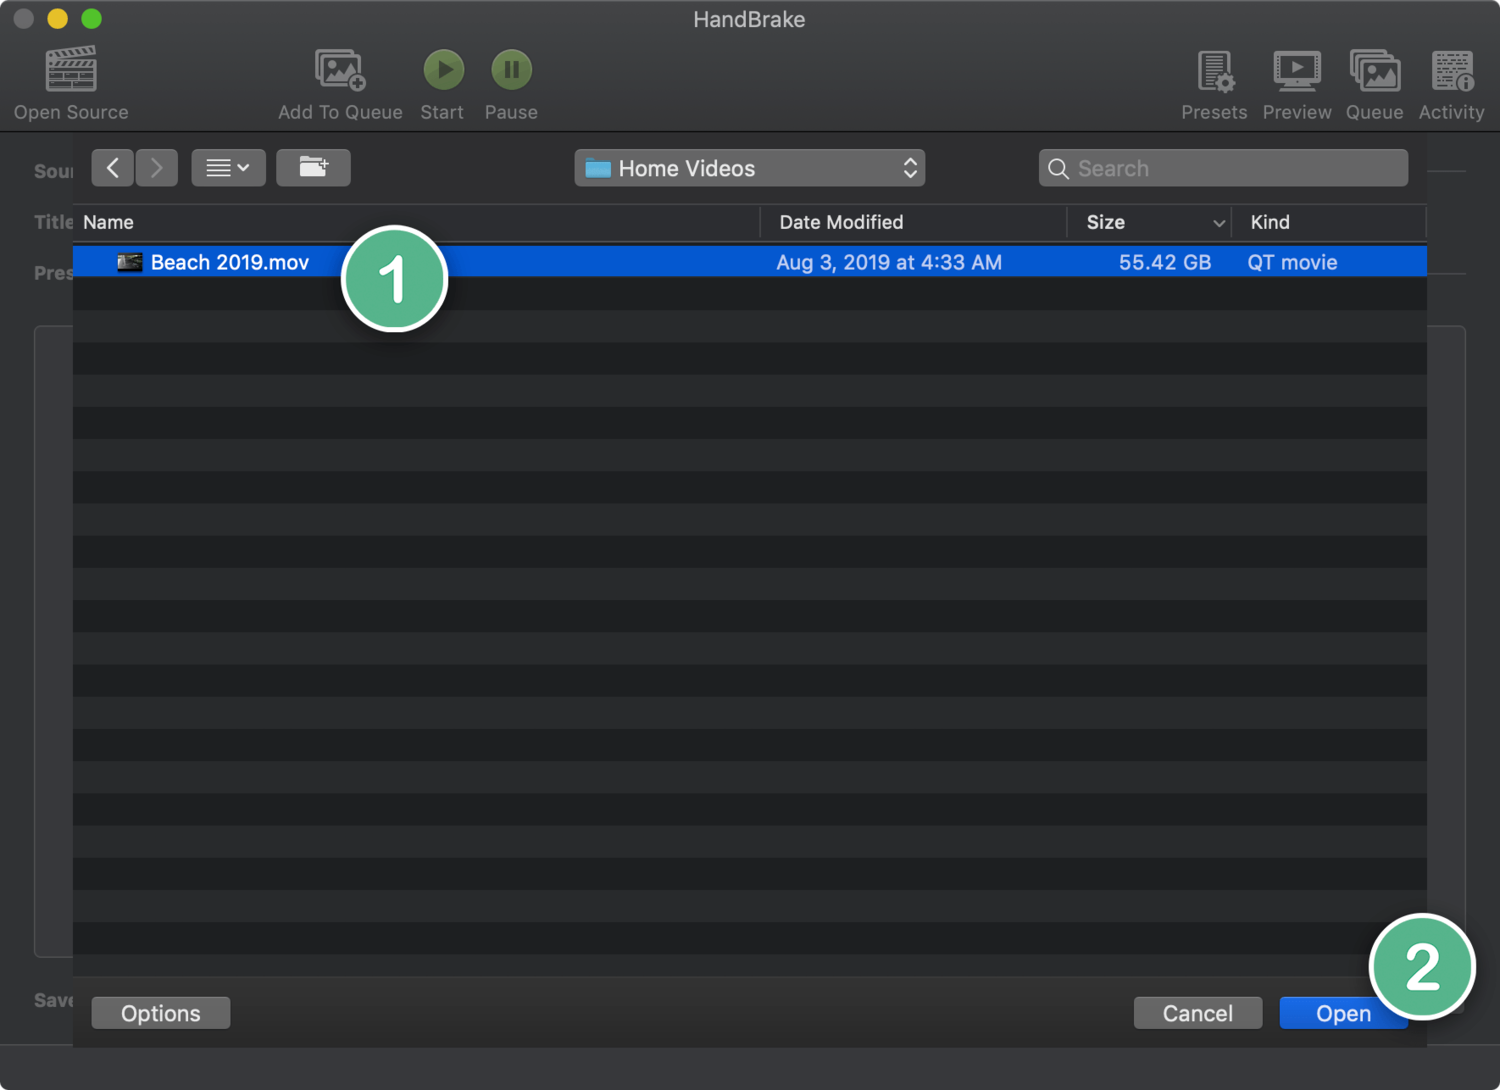
1. When you open Handbrake it will first ask you to select file you want to convert. Browse for the file and then select it. You can also select the “Open Source” icon in the upper right corner on the main toolbar.
2. Click the “Open” button in the bottom right corner.

3. On the upper right corner of the toolbar, click on the “Preset” icon.
4. Under the Web presets, select “Vimeo YouTube 720p30”. Later, if you’re feeling adventurous, you can experiment with the other presets and settings to find the balance of quality and file size.

5. Click on the file name on the bottom right corner of the screen next to “Save As”. Change the file name to something unique.
6. If you’d like to change where the file will be saved, click on the “Browse” button and navigate to a new location.
7. Click on the green “Start” icon in the top toolbar to begin the compression.
It Takes Time…
The time it takes to process will depend on the size of video, preset option, and your computer hardware. Once you are done with the conversion, compare the file size of the original with the new file. You’ll see a significant difference.
Additional Resources
You can estimate how long it could take to upload your video file by following these steps:
1. Run a Speed Test (external site). Take note of the Upload speed.
2. Input the file size in this Upload Calculator (external site).
3. Look for the corresponding transfer speed (your Upload speed) on the chart to get an idea of the best case upload time. In practice, it could take much more than the estimated time.